How to Use the Smart Zoom Overlay Feature in OptosAdvance
The Smart Zoom feature in OptosAdvance enables you to overlay images of different modalities or different study dates for comparison. This allows images to be viewed, adjusted, and blended within an overlay window during image review.
This Tip of the Month outlines how to activate Smart Zoom, adjust the overlay window, compare images, and turn the feature on or off using the available controls.
What Smart Zoom Does
Smart Zoom allows users to place an overlay window on an image to compare images from different modalities or prior study dates. The overlay window can be resized, repositioned, and blended to support comparison during image review.
Activating Smart Zoom
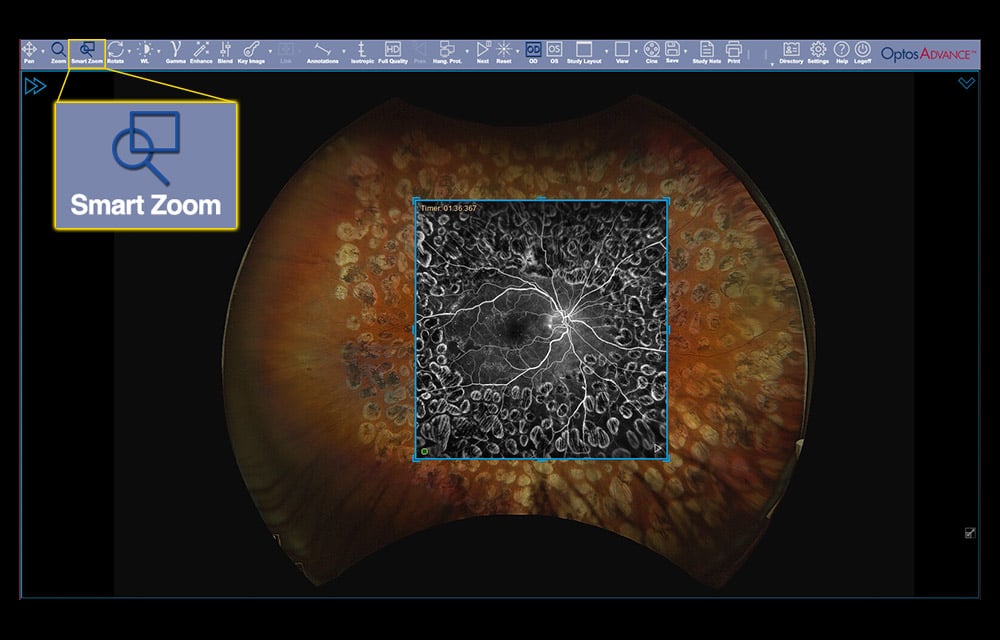
To use Smart Zoom, click the middle scroll wheel while the cursor is positioned over an image or select the Smart Zoom icon on the toolbar. Once activated, an overlay window is applied to the center of the image.
The Smart Zoom window can be resized by dragging its corners to make the box larger or smaller. The overlay can also be moved by dragging the sides of the box to any area of the image, including another viewport if needed.
Adding Images to the Overlay
Different images of the same eye or different image optomap modalities can be added to the Smart Zoom window. To do this, press and hold the left mouse button, drag the desired image into the Smart Zoom window, and release the mouse button to drop the image into the overlay.
A green dot at the bottom left of the Smart Zoom window indicates that vessels have registered correctly. If the dot appears red, the images may not align correctly due to image quality limitations or because the software was unable to register the optic nerve and vessels.
Blending and Playing the Overlay
To blend through the overlaid image, hold down the scroll button and move the mouse toward or away from you to change the transparency within the Smart Zoom window. The Play arrow in the bottom left corner of the overlay window can also be selected to auto play the overlay.
Comparing Prior Imaging Sessions
Prior imaging sessions can be dragged from the timeline into the Smart Zoom overlay window for comparison. Once a prior visit is added, the series thumbnails on the left hand sidebar update to show images from that visit. The desired image modality can then be dragged into the Smart Zoom window.
Using Multiple Smart Zoom Windows
Multiple Smart Zoom windows can be added to a single image. To add another window, right click inside an existing Smart Zoom window and select New. Each Smart Zoom window can be resized or repositioned independently.
Turning Off Smart Zoom
To turn off Smart Zoom, tap the middle scroll wheel outside of the Smart Zoom window or select the Smart Zoom icon on the toolbar.
Learn More
For full step by step instructions and screenshots, refer to the OptosAdvance Imaging Instructions guide, or select the “Help” icon within OptosAdvance for additional guidance.
For support on other topics, please visit our Support Portal for additional resources and assistance.