Changing Layouts and Views in OptosAdvance
OptosAdvance users can customize the review screen to view alternate image modalities and dates of service not provided for by the standard hanging protocol options.
Changing the Study Layout in OptosAdvance
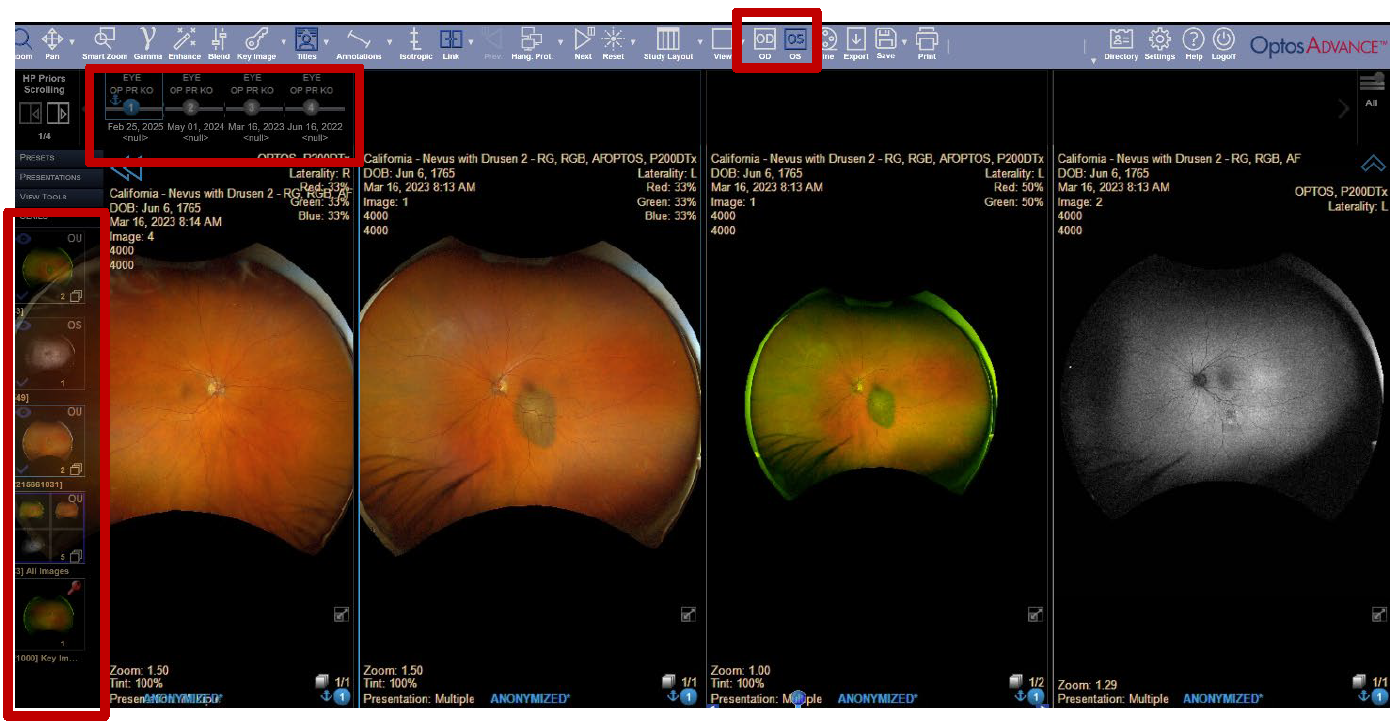
Applying a study layout to the image viewing area divides the area into multiple “screens” called viewports. You can drag a different series or dates of service into each viewport allowing for simultaneous image viewing. The default view is a 1x2 Symmetric Layout.
- Select Study Layout on the toolbar.
- Locate and select the preferred layout (e.g. 1x4 will display 4 viewports with 1 image view in the viewport).
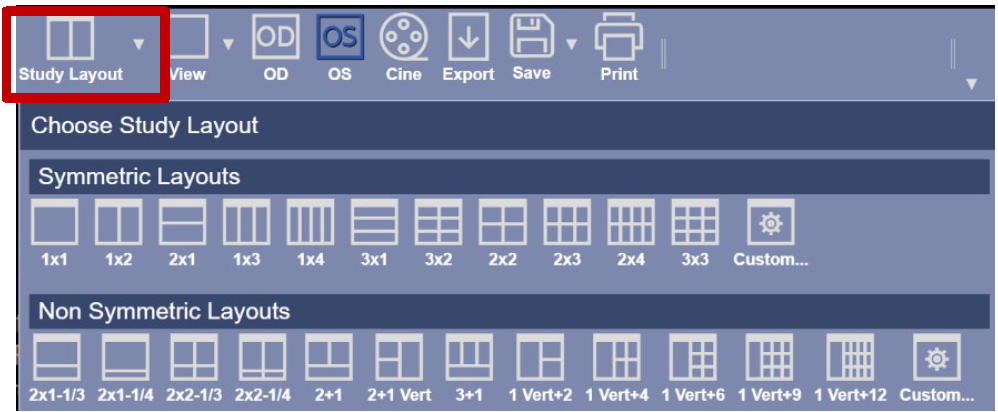
- OptosAdvance will automatically display additional images from the same study date in the additional viewports.
- To change the images displayed from the same date of service, drag and drop the desired images from the left-hand series of thumbnails into the additional viewports.
- To add an additional date of service, drag and drop a study from the timeline into the additional viewport. The left-hand series of thumbnails will display the image modalities available from the selected study date. Drag and drop the desired image into the viewport.
- Assign OD or OS laterality from the toolbar to change the viewport.
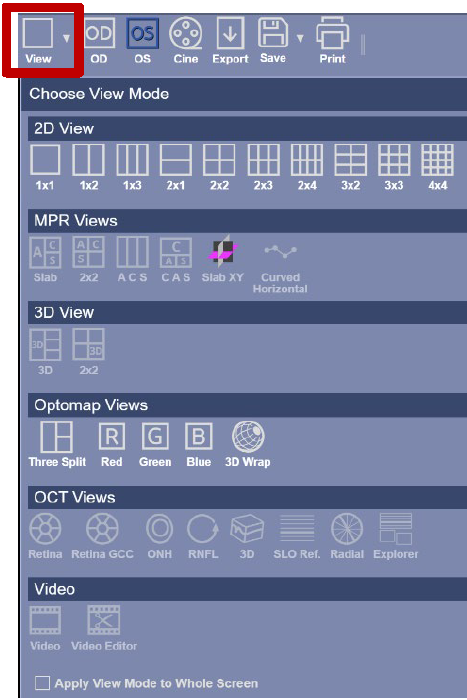
Changing the View in a Viewport in OptosAdvance
A view is a predefined viewport arrangement specific to a clinical scenario. Some views display a single viewport (1x1) while others display multiple viewports, each with a different type of visualization. You can apply different views to each viewport in the study layout or apply the same view to all viewports.
- If the View should be applied to only one viewport, select the viewport by clicking the image. A thin blue box will appear around the viewport
- Select the View icon on the toolbar and choose the view you wish to apply to your selected viewport.
a. MPR Views, 3D View, and OCT Views apply to OCT scans.
b. Views not available to apply are greyed out. - If the View should be applied to the whole screen, check the box Apply View Mode to Whole Screen at the bottom of the View menu.
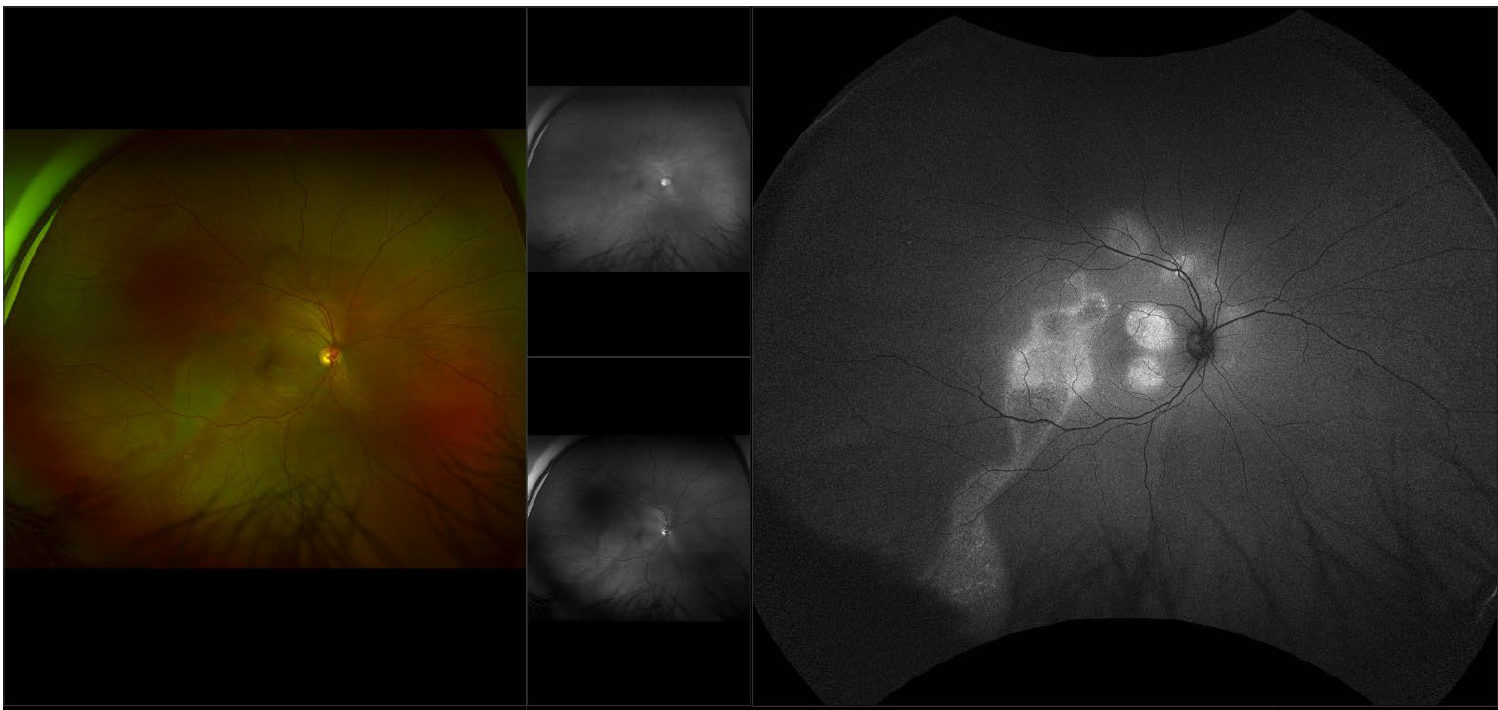
The example below shows a common configuration using Study Layout and View modifications:
• 1x2 Study Layout
• 3-Split View in the left viewport, showing the color image of the right eye, the 100% red-free blended image, and the 100% green-free image
• The right viewport shows the autofluorescence image of the right eye
Available views depend on your OptosAdvance version and device imaging modalities.
Additional Help
If you are looking for further support or have additional inquiries, we encourage you to visit our Contact Us page. Our dedicated support team is readily available to assist you with any questions or concerns you may have.